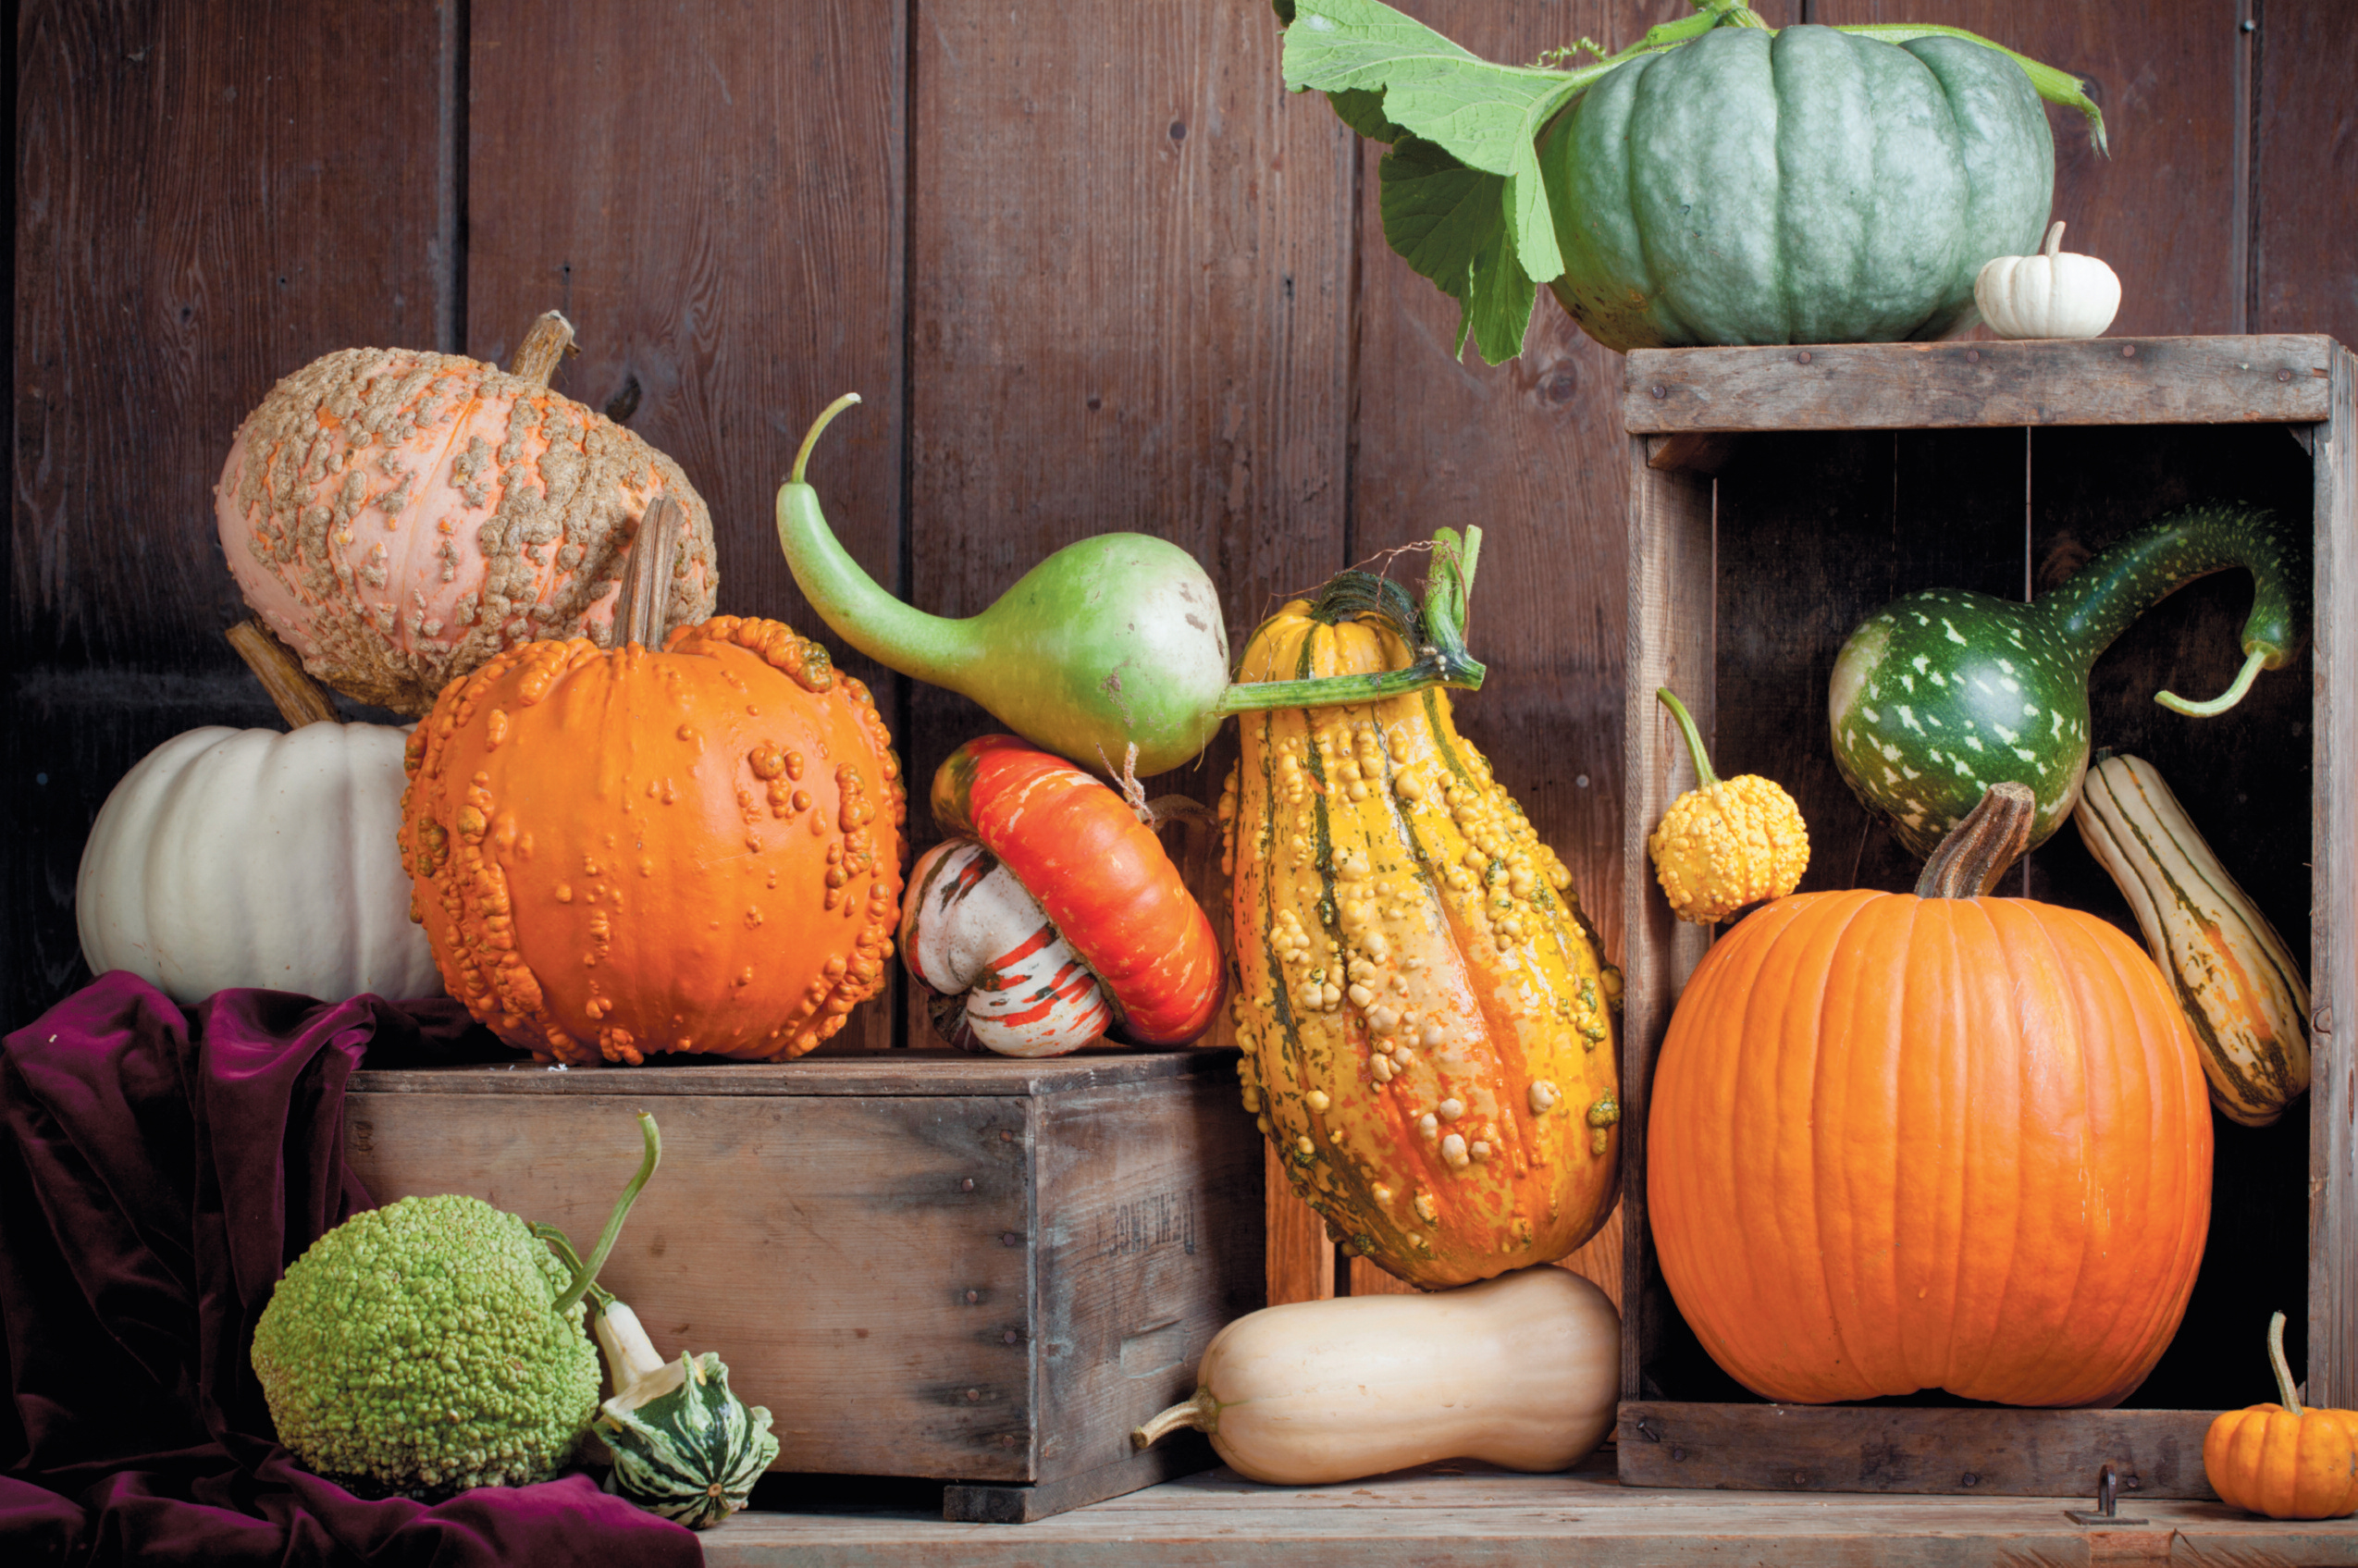
Storing Squash & Preserving Pumpkins
Squashes are one of the oldest cultivated crops, actively farmed for 10,000 years by some estimates. Not only a food source, they are also believed to have been used as containers because of their ability to dry out, as gourds do, into a hollow shell.
Northeastern Native Americans grew pumpkins, yellow crooknecks, patty pans, Boston marrows (reputed to be the oldest squash still sold in America) and turbans. Native Americans roasted or boiled squash and pumpkins and preserved them as conserves in syrup. They also ate the young shoots, leaves, flowers and seeds. New England settlers were not very impressed by the Indians’ squash until they had to survive a harsh winter; its storage qualities could not be denied and the squash became a New England staple.
I was taught in school that the squashes and pumpkins originated in Mexico, were domesticated there and then were slowly introduced northward. But recent advances in genetic studies show that may not have been the case with every species and that some of our favorite New England squash varieties may have originated right here in eastern North America. Genetic and archaeological evidence also provide strong support for the independent domestication of three other plant species in the eastern United States and confirms the region as one of the world’s independent centers of plant domestication.
A 2006 article by Bruce Smith in the Proceedings of the National Academy of Sciences reviews the history of squashes and other crops in eastern North America:
“Between approximately 11,000 and 5000 years ago, human societies in many different regions of the world brought a wide range of different species of plants and animals under domestication, marking the initial emergence of food production and the beginning of one of the major transitions in human history. This transition, often described as the “Neolithic Revolution” or the “Origins of Agriculture” has been an enduring area of study in both archaeology and biology for more than a century.
Of the five species of squash (Cucurbita) that were domesticated from different descendants of wild Cucurbita gourds throughout the Americas (indicated by a well-documented gradual increase in seed size, fruit size and rind thickness, among the more obvious things) only C. pepo is known at the present time to have been independently domesticated more than once, resulting in two present-day domesticate lineages, and now classified as distinct subspecies.
The first of these, C. pepo ssp. pepo, which includes cultivated pumpkins and marrows, was developed from an as yet undocumented wild progenitor in Mexico 10,000 years ago. The second subspecies C. pepo ssp. ovifera, which includes cultivated crooknecks, acorn, and scallop squashes, has been identified as a potential eastern North American domesticate. Both molecular and archaeological evidence now provides compelling support for the independent domestication of C. pepo ssp. ovifera in eastern North America from an indigenous eastern North American Cucurbita gourd.”
Every summer I love to grow as many unusual winter squash and pumpkins as I can discover as well as the tried-and-true standbys like our Waltham butternut and acorn. Trouble is, I have neither the room to grow them nor a place to store them! But I do it anyway, planting them everywhere and anywhere, atop curing mulch piles, under the corn plants, and any empty space I can find. From that point on they are on their own.
As they grow they tumble over one another and spew out onto the lawn and garden paths until parts of our yard become impassable. By summer’s end I have no recollection of what I’ve planted—but that’s the fun part. Once a few hard frosts hit in October and the squash leaves freeze off the vines, the whole place becomes an Easter egg hunt with colorful squash and pumpkins lying everywhere.
Once harvested, the marathon has only just begun—carrying them out of the field is a three-day event. I know I want them cool and shaded, so they first go into a well-ventilated shed until outdoor temperatures begin to threaten a rouge dip into the thirties.
Next they all go into the enclosed north-side porch, which no longer receives the late-day sun that time of year and stays around 50 degrees, day and night. Since it is attached to the house, a little heat seeps in under doors and through the walls (by this time the central heating is on in the house). I continue to keep my eye on the weather and as soon as we are forecast real winter weather—with temperatures falling into the twenties, sometime in late December—the squash and pumpkins get pushed up against the inner walls of the house and covered with some sort of insulation (I use bubble foil insulation).
It is best if you can store them in a single layer on a surface that can “breathe” underneath them. Something like cardboard, wood or straw. Covering the squash and pumpkins with a blanket or a loose layer of straw will also help to protect them from below-freezing temperatures.
Once into January, with temperatures falling into the teens, it gets a bit tricky finding the perfect spot for them, as the porch can get too cold. So in they come, up two flights of stairs, to the bottom of the unheated attic stairs. It’s not something I look forward to, carrying umpteen pumpkins and squash to the attic, some weighing as much as 20 pounds. I check on them regularly to weed out any that show signs of decay—I used to lose about a quarter of them by March.
But this past winter I accidentally discovered a method that worked so well I didn’t lose any to decay, and I will no longer plan the annual hike to the attic. During a bad storm we lost power for three days. I was forced to bring the squash downstairs again, nearer to a heat source: the woodstove. I piled them in the next room on the floor near a drafty pantry door so not to freeze but still be cool with good airflow. At that point the house was about 65 degrees. I never moved them again, just left them there until spring turned to summer, and never lost one!
Keeping cured squash cool, but dry, seemed be the trick. This fall they’ll go directly from the back porch to the kitchen floor. And, as fun as it is to find all the squash suddenly exposed through a frost, I have learned a few lessons about properly collecting them for fall storage.
Keep in mind that dead vines do not indicate maturity in pumpkin and winter squash. When vines die prematurely from disease or drought, the fruits are probably immature and therefore will not store successfully. Immature fruit have a fleshy stem, maturing fruit will have some stem corking, and well-mature fruit will have a well-corked stem.
Mature fruit that have been removed from the vine are still alive, with respiration still taking place. Proper curing and storage slows their rate of respiration and prolongs their storage life. As a rule of thumb, most winter squash need to be cured. Proper curing involves elevating storage temperatures to 80 to 85 degrees F with 75 to 80 percent relative humidity for approximately 10 days. Leaving some varieties out in the field (with protection from the sun by placing the squash under the leaves) before handling will help to harden the skin. Be vigilant for squash bugs that can pierce the skin leaving the squash ripe for decay as well as mice. I once went to move my Dill’s Atlantic Giant pumpkin out of the field only to find it totally empty of seeds and flesh with a family of mice living inside.
Curing also heals wounds, helps ripen immature fruit, and enhances color. After curing, reduce the temperature to 50-55 degrees with relative humidity around 50 percent. A root cellar would be great for that, but any cool, shaded spot will work.
Curing is essential for pumpkins and some winter squash, but butternut, hubbard and some other varieties of specialty squash are not helped by curing. Curing is detrimental to acorn types such as the variety Table Queen. High temperature and relative humidity during the curing process reduce the quality and storage life of acorn squash.
Mature pumpkins and winter squash will always store better than immature fruit. They should be well matured and free from injury and decay. Leave a long stem on pumpkins, but on winter squashes such as the hubbard types, the stems should be completely removed. They should be kept dry and provided with good air circulation. Too much humidity will promote decay and too little will cause excessive weight loss.
By late spring I usually begin throwing out any unused squash and pumpkins into the yard where they feed the sheep and chickens. Some end up drying out in the sun like gourds. Tut, my ram, likes to crush them by jumping straight up in the air over them and diving down upon them head first, pulverizing the empty dry shells.
The word squash comes from a Narragansett word, askutasquash, meaning, “green thing that is eaten raw”. Winter squash was dried raw by American Indians by slicing it thinly and stringing and hanging the slices, or cutting it into strips and spreading them on cleaned flat rocks to dry in the sun. The Pueblo Indians filled basket trays and put them on rooftops to dry. Squash pieces were especially good for winter stews, often sweetened with a few dried peaches.
Procedure for drying winter squash
- Wash the fruit thoroughly. Get rid of any leaves, stems, or pits.
- If the fruit is large, cut it into 1/2-inch slices. Squeeze lemon juice on the slices to keep them from turning brown.
- Cover a board or tray with cheesecloth. Place the slices or whole fruits on it. They should not touch one another.
- Cover the fruit with a second layer of cheesecloth. Move the board or tray into a sunny spot. Let the fruit dry outside for several days. Turn the fruit three or four times. Take the tray in each night and in the daytime if it rains. Depending on the kind of fruit, it may take from 2 to 6 days to dry.
- Store the fruit in a covered jar or in the refrigerator.


