Make Your Own 'Hillbilly' Wine
Some call it “hillbilly wine,” others would never drink it on principle, and most people have never even heard of it, now that we, as a society, buy our wine in 750 ml. bottles and comment on its floral notes and hints of vanilla and peach.
The elixir I’m talking about is homemade, four-ingredient fruit wine. It’s a simple by-product of hungry yeasts feasting on the sugar contained in the summer and fall harvests of ripened fruits. For many thousands of years it was a method of preservation analogous to canning, allowing folks to still enjoy their fruit in those cold winter months.
In terms of taste, the sticklers are right; you can most certainly buy a better bottle of wine, or make your own in a far more complicated process involving heavy chemistry. But this is a straightforward, fun process involving about an hour of your time, and a great payoff after a few months.
When it comes to wine, I’m still a hopeless amateur. But I got the courage to try this recipe after a friend invited me to take a swig of his passionfruit wine that he’d made himself on his farm on the Big Island of Hawaii.
It was a little yeasty, yes, and strong, but the flavor of the passionfruit and its sweetness shone through wonderfully.
I was hooked!
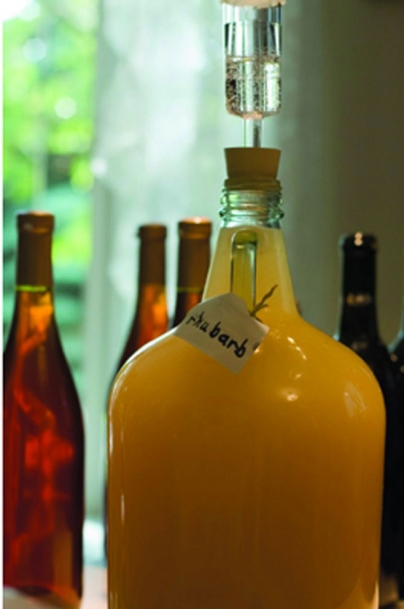
When I returned home, I washed out a five-gallon water jug and then spent the afternoon clambering around in a few strawberry guava trees with friends, collecting enough of the super-sweet berries for my own wine.
After I had combined the water, fruit, sugar and yeast, the most magical thing happened; the concoction started bubbling, slowly at first, then more rapidly, as the yeasts devoured the sugars. Two months and many tastings later, we had a great party—and the guest of honor was my pale pink guava wine.
Now I’m passing the recipe on to you, my friends. It’s easy enough to try, and a great way to use local fruit from farm stands and markets across the Cape.
HILLBILLY FRUIT WINE
Ingredients:
- 1 gallon of water
- 1 gallon of crushed, clean fruit (16 cups)
- 3-4 pounds of white granulated sugar (see note)
- 1/8 tsp. wine yeast, or 3 tsp. active dry yeast (regular baking yeast)
Equipment:
- 5 gallon plastic bucket (with bottom spigot and tight-fitting top, sanitized)
- Clean mesh or cheesecloth bag (optional, but makes straining a lot easier)
- Fermentation airlock (optional; see below)
- Big pot
Instructions
- Note: Yeast will only consume about 2-1/2 pounds of sugar per gallon of water, according to the pleasantly quaint, 60s-era book Home Brewing Without Failures. Therefore, any sugar beyond that you add will serve only to sweeten the wine, because the brew becomes alcoholic enough to kill the yeast, which are living organisms, at that point. Using four pounds in the recipe above will give you a pretty sweet wine. If you’re not a fan, try going with only three pounds per gallon.
- For the fruit: I recommend using local, in-season fruits like cranberries, raspberries and blueberries, but don’t worry if they’re not totally fresh. After all, you are fermenting them for two months. Don’t use citrus. It will work, but it doesn’t produce a very tasty wine.
- Once your fruit is clean, mix it in with your water and sugar in a big pot on low heat. At the same time, put your yeast into a small dish of lukewarm water to start it reacting. It should fizz up and smell faintly, well, yeasty. If it does, that’s good! Once your fruity concoction is simmering (don’t boil it!) and the sugar has dissolved and fruit has broken down a bit, turn it off and let it cool (save a tiny bit of the fruit for fresh jam, it’s real tasty).
- The last step is pretty simple. Pour your fruit mixture AND the yeast mixture into your fermentation container (i.e. bucket), gently swirling it to mix everything together. Keep all the fruit solids in your mesh bag, inside the bucket. It’ll make straining easier. Then, either affix the fermentation lock, or go the cheap way, and get yourself a rubber glove or a piece of a bicycle tube. Poke a hole in the rubber with a needle, tie off the top of the tube. And seal it onto the top of the container. That way, gas can escape, but no pathogens can get in
- If the yeast is working, bubbles should soon start to form and rise up in your murky wine must—the term for the pre-fermentation juice. The rubber glove should stand up on its own as the gas spills out. Store your wine in a cool, lowlight area.
- After about a week, you can check the wine. It should taste mildly alcoholic and very sweet at this stage. Don’t get excited and drink too much, because it can give you a tummy-ache. (Like real wine can’t.) In about two months, it should be ready. Don’t restrain yourself at this point. Strain it out, put it in some recycled wine bottles, and go wild.
- Have a hillbilly wine party, invite your friends, and impress them with your wine’s ability to cause hangovers.
HARDEN UP SOME OF THAT GOOD OL’ CIDER
More wine than beer, but easier to take on a date than a glass of merlot, a pint of hard cider is a delicious but somewhat uncommon beverage in America. It’s imbued with a crisp, light sweetness that’s perfect for chilly fall evenings. And afternoons. Even late mornings, sometimes.
OLD-FASHIONED HARD CIDER
(Adapted from Mother Earth News)
This is a simple recipe adapted from a few sources. The first step, as always, is picking your fruit. Although in this case I recommend buying apple cider instead of pressing the apples yourself. Choose preservative-free cider that doesn’t contain the ingredients sodium benzoate or potassium sorbate on the label. Cold pasteurized cider will also leave the original flavor of the apples intact, so look for that as well. Here’s what you’ll need:
Ingredients:
- 5 gallons preservative-free cider
- 2 packets wine yeast
- Optional: 2 pounds brown sugar or honey
- Optional: for starter, a bottle of preservative-free apple juice
Equipment:
- One 5-gallon food-grade plastic bucket with spigot, and lid (sanitized)
- Fermentation airlock
- Optional: big pot
- Clean jugs or growlers to fill with cider
Instructions
Okay, so there are two ways to go about this. The brave way, and the smart way.
-
In a nutshell, the brave way: pitch it all in. Literally, pour your cider and yeast into the bucket, slap the top on and shake it to mix it all up. In three weeks, you’ll have hard cider. However, the downsides to this method are that wild yeasts may get in and affect the final flavor of the product (although they may make it taste better), and your brew won’t be as alcoholic without the addition of the honey or sugar.
-
Here’s the slightly more labor-intensive, smart way. To make your starter the day before you brew, pour some yeast into a 3/4 full apple juice bottle. Close it, shake and leave out until it starts bubbling, then open the top to relieve pressure. Put it in the fridge overnight, and take it out a few hours before brewing.
-
When you’re ready, simmer the cider in a big pot for 45 minutes— but don’t let it boil, it will make the cider hazy—adding in the sugar or honey so it can dissolve.
-
Let the cider cool down until it’s barely lukewarm, then add your yeast starter, mix it all together in your fermentation bucket, cap and airlock it, and store it in a dark room or closet where the temperature is at least 60°, but no more than 75°. If the room drops below 60°, the yeast won’t ferment the sugars, which is a bit counterproductive.
-
The mixture should start bubbling within a few days, and within two weeks your fermentation is complete. The mixture should sit for another week or so to let the yeast settle, and afterwards, it’s simple: bottle and enjoy! Once you bottle it, however, you can let it sit for as long as a month or so to let the flavors improve and the “fizziness” increase.
-
***
If you happen to like the process of winemaking, you can most certainly scale up and make a more sophisticated vintage with the help of some equipment and advice from Todd Marcus, the owner of Cape Cod Beer and a home winemaker himself.
Marcus is a consummate professional, and though he’s tasted some delicious homemade elderberry and dandelion wine, he doesn’t advocate making hillbilly fruit wine. He tells me, in a very straightforward way, “Use an already made (fruit) concentrate that’s been pH and sugar balanced.”
Marcus sells wine and beer kits of all sorts at his homebrew supply store (located at Cape Cod Beer in Hyannis), so if you’re not really a DIY type, go buy a kit. You’ll be looking at an initial investment of about $130 for equipment, plus fruit wine ingredient kits cost about $70, according to Marcus, who pointed out that many folks quickly quit the kits after a few brewing sessions. “People find they like winemaking so much they stop using kits and start harvesting the grapes themselves,” he said.
In the end, it’s up to you. If you’re more of a paint-by-numbers person, scoot over and buy yourself a kit. But if you’re looking for a little more of an organic experience, try yourself some of the old-fashioned stuff.